Joystick Shield
Detalii Joystick Shield
Produs actualizat în urmă cu 3 ani
Descriere YEO:
Descriere magazin:
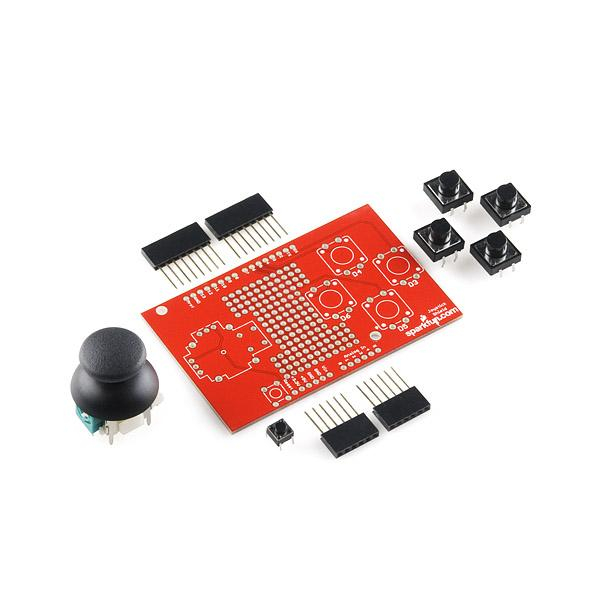
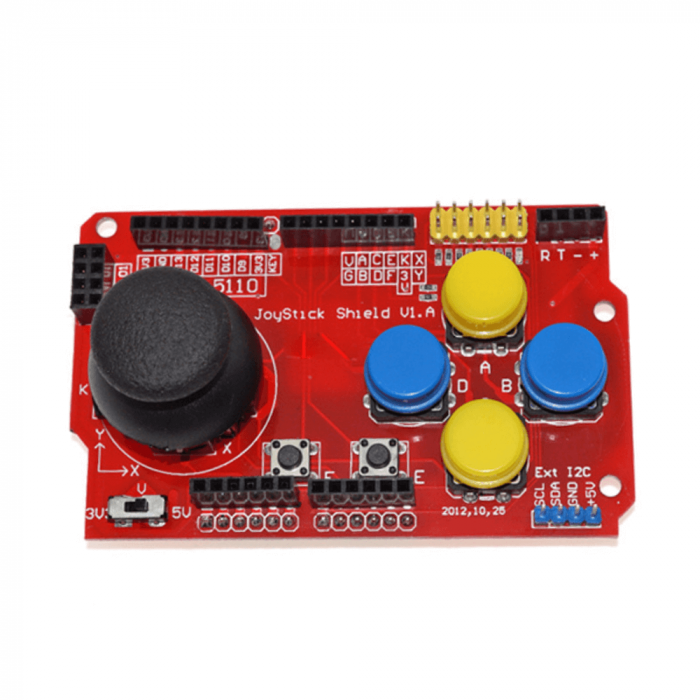
Shield Joystick pentru Arduino. Exemplu: char button0 3, button1 4, button2 5, button3 6; char sel 2; void setup(void) { pinMode(sel, INPUT); Set the Joystick 39;Select 39;button as an input digitalWrite(sel, HIGH); Enable the pull-up resistor on the select button pinMode(button0, INPUT); Set the Joystick button 0 as an input digitalWrite(button0, HIGH); Enable the pull-up resistor on button 0 pinMode(button1, INPUT); Set the Joystick button 1 as an input digitalWrite(button1, HIGH); Enable the pull-up resistor on button 1 pinMode(button2, INPUT); Set the Joystick button 2 as an input digitalWrite(button2, HIGH); Enable the pull-up resistor on button 2 pinMode(button3, INPUT); Set the Joystick button 3 as an input digitalWrite(button3, HIGH); Enable the pull-up resistor on button 3 Serial.begin(9600); Turn on the Serial Port at 9600 bps } void loop(void) { Serial.print(analogRead(0)); Read the position of the joysticks X axis and print it on the serial port. Serial.print( , ); Serial.print(analogRead(1)); Read the position of the joysticks Y axis and print it on the serial port. Serial.print( , ); Serial.print(digitalRead(sel)); Read the value of the select button and print it on the serial port. Serial.print(digitalRead(button0)); Read the value of the button 0 and print it on the serial port. Serial.print(digitalRead(button1)); Read the value of the button 1 and print it on the serial port. Serial.print(digitalRead(button2)); Read the value of the button 2 and print it on the serial port. Serial.println(digitalRead(button3)); Read the value of the button 3 and print it on the serial port. Wait for 100 ms, then go back to the beginning of 39;loop 39; and repeat. delay(100); } Linkuri: Asamblare Tutorial Schema Eagle Exemplu Arduino
Joystick Shield - Disponibil la robofun.ro
Pe YEO găsești Joystick Shield de la Sparkfun, în categoria Reduceri.
Indiferent de nevoile tale, Joystick Shield din categoria Reduceri îți poate aduce un echilibru perfect între calitate și preț, cu avantaje practice și moderne.
Preț: 57 Lei
Caracteristicile produsului Joystick Shield
- Brand: Sparkfun
- Categoria: Reduceri
- Magazin: robofun.ro
- Ultima actualizare: 18-02-2022 23:11:41
Comandă Joystick Shield Online, Simplu și Rapid
Prin intermediul platformei YEO, poți comanda Joystick Shield de la robofun.ro rapid și în siguranță. Bucură-te de o experiență de cumpărături online optimizată și descoperă cele mai bune oferte actualizate constant.
Descriere magazin:
Shield Joystick pentru Arduino. Exemplu: char button0 3, button1 4, button2 5, button3 6; char sel 2; void setup(void) { pinMode(sel, INPUT); Set the Joystick 39;Select 39;button as an input digitalWrite(sel, HIGH); Enable the pull-up resistor on the select button pinMode(button0, INPUT); Set the Joystick button 0 as an input digitalWrite(button0, HIGH); Enable the pull-up resistor on button 0 pinMode(button1, INPUT); Set the Joystick button 1 as an input digitalWrite(button1, HIGH); Enable the pull-up resistor on button 1 pinMode(button2, INPUT); Set the Joystick button 2 as an input digitalWrite(button2, HIGH); Enable the pull-up resistor on button 2 pinMode(button3, INPUT); Set the Joystick button 3 as an input digitalWrite(button3, HIGH); Enable the pull-up resistor on button 3 Serial.begin(9600); Turn on the Serial Port at 9600 bps } void loop(void) { Serial.print(analogRead(0)); Read the position of the joysticks X axis and print it on the serial port. Serial.print( , ); Serial.print(analogRead(1)); Read the position of the joysticks Y axis and print it on the serial port. Serial.print( , ); Serial.print(digitalRead(sel)); Read the value of the select button and print it on the serial port. Serial.print(digitalRead(button0)); Read the value of the button 0 and print it on the serial port. Serial.print(digitalRead(button1)); Read the value of the button 1 and print it on the serial port. Serial.print(digitalRead(button2)); Read the value of the button 2 and print it on the serial port. Serial.println(digitalRead(button3)); Read the value of the button 3 and print it on the serial port. Wait for 100 ms, then go back to the beginning of 39;loop 39; and repeat. delay(100); } Linkuri: Asamblare Tutorial Schema Eagle Exemplu Arduino
Produse asemănătoare
Produse marca Sparkfun